Purchase Requisitions
A Purchase Requisition is used to officially record the need to purchase goods or services in the ProcureSwift system. It represents the first step of the procurement process and is subject to approval based on predefined rules.
Viewing the List of Purchase Requisitions
- In the main menu, go to Purchasing.
- Select Purchase Requisitions.
A list of all created purchase requisitions will be displayed, including their status, budget, currency, and creation date.
Creating a New Purchase Requisition
- In the Purchase Requisitions section, click Create.
- The Purchase Requisition Sheet form will open.
Basic Purchase Requisition Information
At the top of the Purchase Requisition Sheet, the user fills in the basic information about the purchase requisition, such as the request name, linked project, budget, dates, currency, and delivery location. These details define the context of the purchase and determine which project and budget the request will be associated with.
Description of the Items
In the Description of the Items section, the user adds individual items that are part of the purchase request.
To add a new item, click + Add Item and fill in all required fields, including:
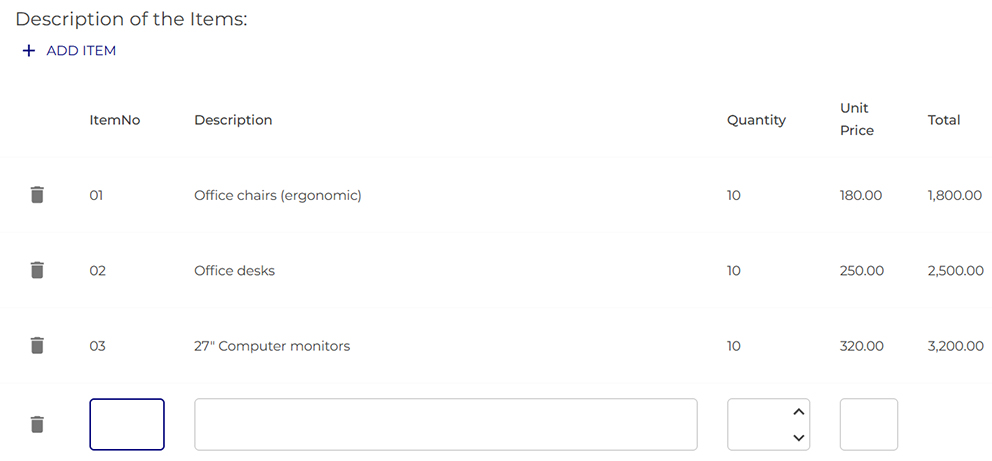
All fields must be completed!
If any field is left empty, the system will not allow the item to be added. An item can only be saved when all required values are provided.
The Total amount for each item is calculated automatically based on the quantity and unit price.
When creating a purchase requisition, you do not enter the procurement method, supplier, or approvers. After submission, the requisition is automatically assigned to a procurement specialist, who selects the appropriate procurement method (Simple Procurement, RFQ, or RFP), chooses the supplier, and moves the requisition forward in the procurement process. For details, see the Procurement Specialist guide.
Attachments
At the end of the form, documents related to the purchase requisition can be attached:
- a maximum of 5 files,
- a maximum file size of 5 MB per file,
- files can be uploaded either by selecting them or using drag & drop.
Saving the Requisition
After completing all required information, the user has two options:
- Save Draft – saves the requisition as a draft,
- Save and Submit for Approval – saves the requisition and sends it for processing. The requisition is then automatically assigned to a procurement specialist and enters the approval workflow.